Setting Up a PySpark Notebook using Docker: A Step-by-Step Guide
We will guide you through setting up a PySpark Jupyter Notebook using Docker. This tutorial is particularly useful for those of you keen on diving into the world of big data analytics using PySpark.
Hello readers! Today, we will guide you through setting up a PySpark Jupyter Notebook using Docker. This tutorial is particularly useful for those of you keen on diving into the world of big data analytics using PySpark.
Step 1: Pull the Docker Image
Start by pulling the jupyter/all-spark-notebook image, which is packed with Spark 3.5.0.
docker pull jupyter/all-spark-notebook:spark-3.5.0
Step 2: Set Up Your Workspace
Before we run our Docker image, we need to set up a directory where our Spark data will be stored.
Create a directory named sparkdata in your workspace. Remember, you'll need to adjust the path in the next step to match your system setup. In this directory you can store any CSV file.
We dropped the CSV file from https://www.kaggle.com/datasets/lava18/google-play-store-apps (shared below for your convenience).
Step 3: Run the Docker Image
Now, let's run the Docker image and map our sparkdata directory to the container.
Replace /Users/datasciencefm/workspace/sparkdata with the path to your sparkdata directory.
docker run -d -P --name notebook -v /Users/datasciencefm/workspace/sparkdata:/sparkdata jupyter/all-spark-notebook:spark-3.5.0
Step 4: Retrieve the Port Mapping
To access the Jupyter Notebook, we need to know which host port has been mapped to the container's port 8888. Execute the following command:
docker port notebook 8888
For us, the output was 0.0.0.0:55002.
Step 5: Fetch the Notebook Token
For security reasons, Jupyter Notebooks are protected by tokens. Let's fetch this token:
docker logs --tail 3 notebook
Your output should resemble this URL: http://127.0.0.1:8888/lab?token=YOUR_TOKEN_HERE
Step 6: Access the Jupyter Notebook
Replace the default port in the URL with the one you identified in Step 4. In our case, the updated URL is:
http://127.0.0.1:55002/lab?token=82f8bf90a86103ca2e029241df7a59200c1aff788e1c2fbb
Simply paste this URL into your browser to open your Jupyter Notebook.
Step 7: Dive into PySpark!
Now, it's time to get our hands dirty with PySpark. Start a new Python notebook and enter the following code:
from pyspark.sql import SparkSession
# Spark session & context
spark = SparkSession.builder.master("local").getOrCreate()
sc = spark.sparkContext
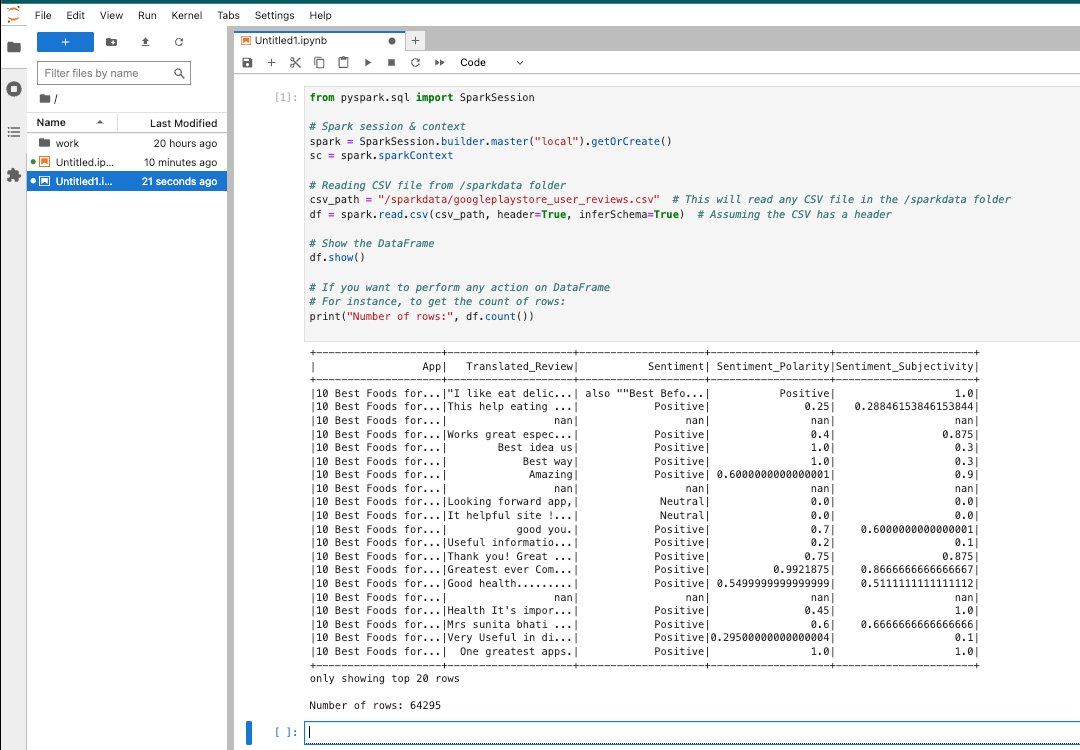
# Reading CSV file from /sparkdata folder
csv_path = "/sparkdata/googleplaystore_user_reviews.csv" # This will read any CSV file in the /sparkdata folder
df = spark.read.csv(csv_path, header=True, inferSchema=True) # Assuming the CSV has a header
# Show the DataFrame
df.show()
# If you want to perform any action on DataFrame
# For instance, to get the count of rows:
print("Number of rows:", df.count())
This will initialize a Spark session, read a CSV file from the /sparkdata directory, and display its contents.
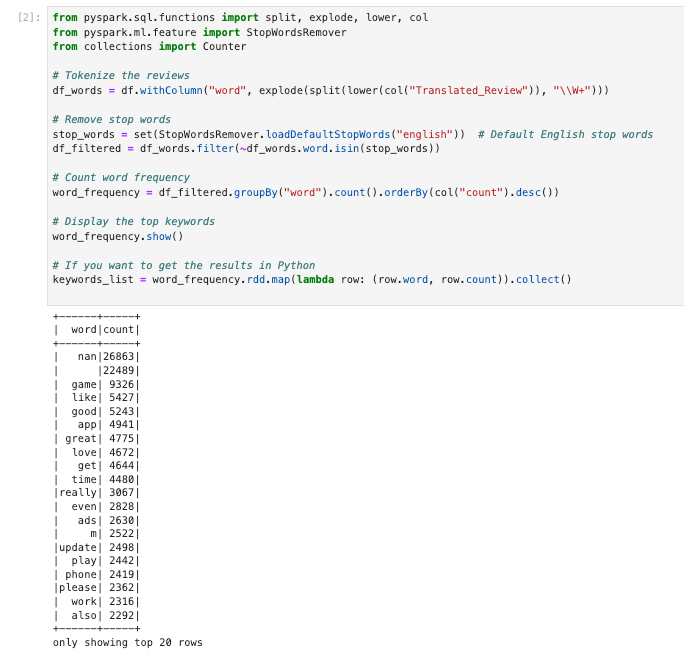
Extract top keywords from the reviews column
from pyspark.sql.functions import split, explode, lower, col
from pyspark.ml.feature import StopWordsRemover
from collections import Counter

# Tokenize the reviews
df_words = df.withColumn("word", explode(split(lower(col("Translated_Review")), "\\W+")))

# Remove stop words
stop_words = set(StopWordsRemover.loadDefaultStopWords("english"))  # Default English stop words
df_filtered = df_words.filter(~df_words.word.isin(stop_words))

# Count word frequency
word_frequency = df_filtered.groupBy("word").count().orderBy(col("count").desc())

# Display the top keywords
word_frequency.show()

# If you want to get the results in Python
keywords_list = word_frequency.rdd.map(lambda row: (row.word, row.count)).collect()
Extract top bi-grams and tri-grams from the reviews column
from pyspark.sql.functions import split, col, explode, lower, when
from pyspark.ml.feature import NGram, StopWordsRemover

# Replace null values in the Translated_Review column with an empty string
df = df.withColumn("Translated_Review", when(col("Translated_Review").isNull(), "").otherwise(col("Translated_Review")))

# Tokenize the reviews
df_tokenized = df.withColumn("words", split(lower(col("Translated_Review")), "\\W+"))

# Remove stop words
stop_words = StopWordsRemover.loadDefaultStopWords("english")
remover = StopWordsRemover(inputCol="words", outputCol="filtered_words", stopWords=stop_words)
df_filtered = remover.transform(df_tokenized)

# Generate bi-grams
bigram = NGram(n=2, inputCol="filtered_words", outputCol="bigrams")
df_bigrams = bigram.transform(df_filtered)

# Generate tri-grams
trigram = NGram(n=3, inputCol="filtered_words", outputCol="trigrams")
df_trigrams = trigram.transform(df_bigrams)

# Count bi-gram frequency
bigram_freq = df_bigrams.withColumn("bigram", explode(col("bigrams"))) \
    .groupBy("bigram").count() \
    .orderBy(col("count").desc())

# Count tri-gram frequency
trigram_freq = df_trigrams.withColumn("trigram", explode(col("trigrams"))) \
    .groupBy("trigram").count() \
    .orderBy(col("count").desc())

# Display results
bigram_freq.show()
trigram_freq.show()

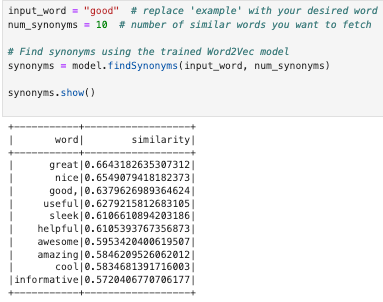
Finding similar words using Word2Vec algorithm
from pyspark.ml.feature import Word2Vec, Tokenizer
from pyspark.sql.functions import when

# Handle null values
df = df.withColumn("Translated_Review", when(col("Translated_Review").isNull(), "").otherwise(col("Translated_Review")))

# Tokenization
tokenizer = Tokenizer(inputCol="Translated_Review", outputCol="words")
df_words = tokenizer.transform(df)

# Apply Word2Vec
word2Vec = Word2Vec(vectorSize=100, minCount=0, inputCol="words", outputCol="features")
model = word2Vec.fit(df_words)
df_vectors = model.transform(df_words)

input_word = "good"  # replace 'good' with your desired word
num_synonyms = 10  # number of similar words you want to fetch

# Find synonyms using the trained Word2Vec model
synonyms = model.findSynonyms(input_word, num_synonyms)

synonyms.show()
Access Our Spark Cluster
Interested in enhancing your data engineering skills? Apply now to gain access to our Spark cluster:
- Hands-on Learning: Experience the power of learning on an actual Spark cluster.
- End-to-End Workflows: Build and test complete data processing workflows.
- Jupyter Notebooks: Use Jupyter Notebooks to write and test your PySpark and SparkSQL code.
- Curriculum Access: From beginner to advanced, follow a structured curriculum to solve complex problems.
- Industry Datasets: Work with datasets like Movie Lens for recommender systems and Common Crawl for NLP tasks. And many more datasets available.
Conclusion
Congratulations! You've successfully set up a PySpark environment using Docker and executed your first few PySpark commands in a Jupyter Notebook.
The world of big data analytics is vast and offers numerous exciting challenges.
With the tools you've set up today, you're well-equipped to tackle them head-on.
Dive in, explore, and don't hesitate to experiment with your data using PySpark.
Happy data analyzing!